How to remove Dedicated IP and set a Shared IP address for a cPanel account? ~ Suppose you have assigned a Dedicated IP address to an individual cPanel account and looking to revoke the changes; you can consider this article a perfect guide for that.
To remove a dedicated IP and set a shared IP address for a cPanel account, you’ll need to follow these steps:
Access WHM (Web Host Manager)
Log in to your WHM account using your credentials. WHM is typically accessible at https://your-domain.com:2087 or https://IP-address: 2087 or https://server-hostname: 2087

Navigate to IP Functions
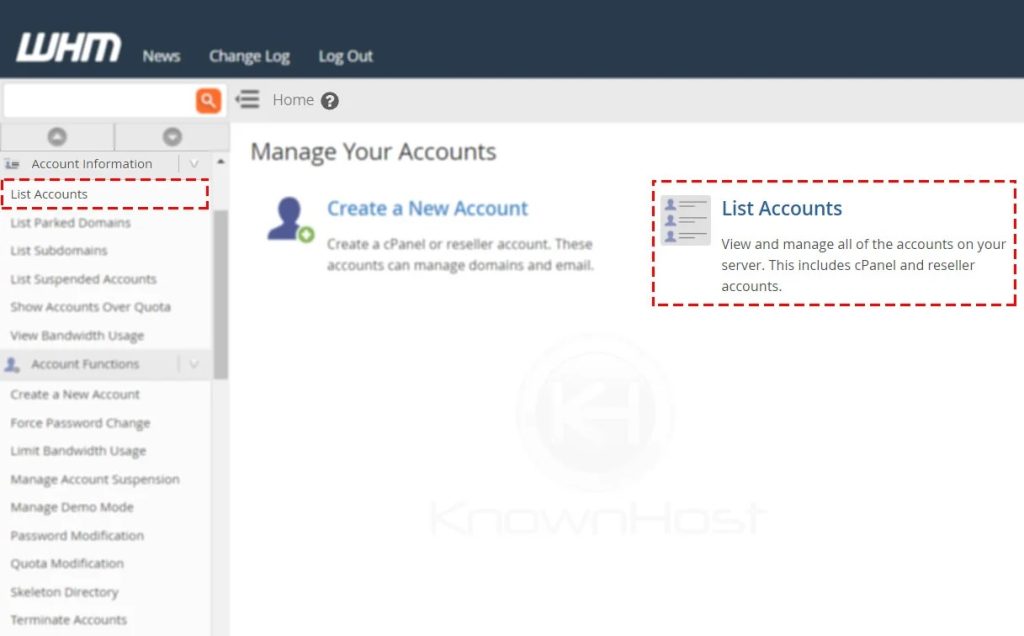
- Navigate to Account Information → List Account or Home → List Account
- Here, you have a list of cPanel account, search for the specific cPanel account using multiple filters. To expand the available options for the cPanel account, click on “+”.
- Now, click on Change IP Address
Remove Dedicated IP and Set a Shared IP Address
- From the Drop-down, select the Shared IP Address. All the shared IP addresses configured in the WHM server will be noted with Shared by following the assigned shared cPanel account’s username.
- To confirm the changes, click on Change to Remove the Dedicated IP and Set a Shared IP Address.
- Congratulations! You have successfully assigned a shared IP address for the cPanel account.